

Summer months in the northwest are an ideal time for backcountry photography. With long days, clear skies, and endless ranges among the Olympic and Cascade mountains, opportunities to explore abound. Fellow photographers reach out with great interest to go into the backcountry, but are unsure where to start. Packing and preparation can be overwhelming. If you enjoy wildlife, landscape, or night photography and getting to distant places seldom seen, this post will serve as launching pad for your next backcountry photography trip.
Backcountry Photography: Before you Go
When preparing for a backcountry photography trip, first thing first, check the weather before setting out to a trailhead. The weather makes or breaks a trip.
Time in the backcountry quickly becomes unpleasant if weather turns and you are unprepared to deal with it. To start, I identify 2-3 different areas I want to photograph in opposite directions. A couple days before heading out I choose the one with the best weather. Clear skies with minimal light pollution is preferable. However, if you are shooting sweeping landscapes – cloud cover can add dramatic effect to final images. It all depends on what you want. If you are chasing night shots of the milky way, for example, avoid light pollution and cloud cover. Resources I will typically check include this light pollution map and clear dark sky – an excellent website with 48 hour clear and dark sky forecasts for different North American locations. Weather Underground has proven time and again to provide accurate weather forecasts for backcountry photography in the pacific northwest.
The Sacred Backcountry Photography P-illars
Preparation and packing – the Sacred P’s – are religion for Explorers. The same applies for backcountry photography. Two concepts that guide my preparation and packing process are 1) you can handle anything so long as you are prepared and 2) there are always trade-offs, so choose what is best for you.
Preparation
When planning your backcountry photography trip, it is awfully satisfying to zero in on a mountain, valley, or ridgeline on a topo map and spending the next 24-48 hours ascending and photographing it. Yet hiking that mountain begins well before you ever step foot at its base.
Backcountry photography in distant places requires a high degree of self-reliance. Simply put, you are responsible for going in and coming out with everything and everyone you set out with – safely. This requires a high level of physical and mental fitness to endure long days of hard work carrying heavy equipment. For example, to climb 1,500 feet of elevation with 35 – 45 pounds of equipment, figure it will take five sets of 300 foot climbs, each taking 15 – 30 minutes of non-stop work. Having a realistic understanding of what it takes to gain elevation and distance is crucial for a successful backcountry photography trip.
Packing
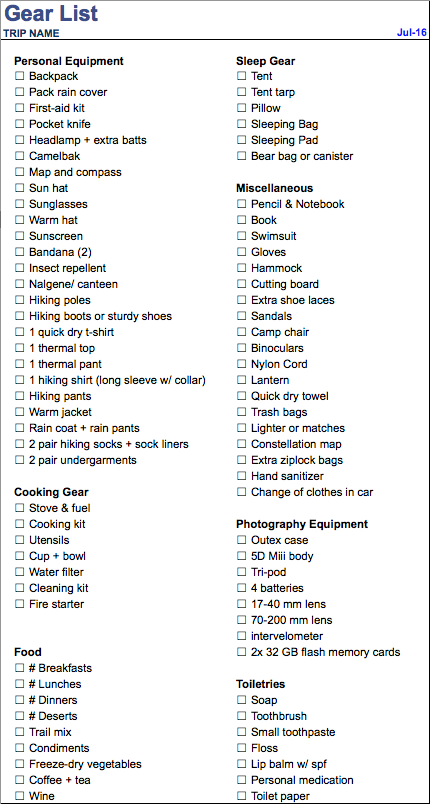
There are always trade-offs with backcountry photography. Each additional piece of equipment you bring expands the scope of what can be captured. It also adds to the ever-growing weight in your pack. Before you set out, make a list of every piece of equipment for hiking, staying overnight, and capturing a specific set of images. Once the list is laid out, go through each item and determine if it is a NEED versus a WANT. A need is an item required to accomplish the goals of the trip with a safe return. A want is something that adds value to the trip (i.e. a pillow or binoculars) but isn’t required. Below is a sample packing list. In the interest of carrying as little weight as possible, I ruthlessly distill needs versus wants. Remember, every pound counts.
Backcountry Photography Camera Equipment
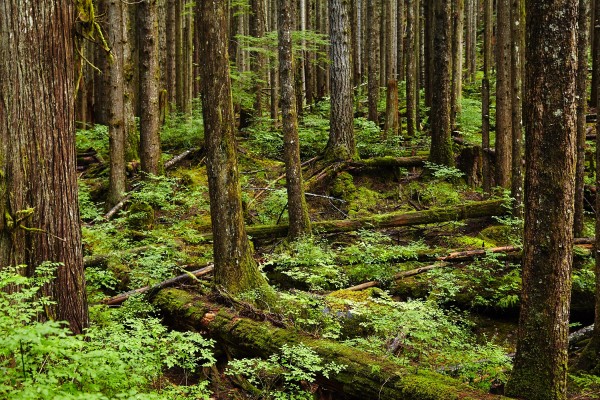
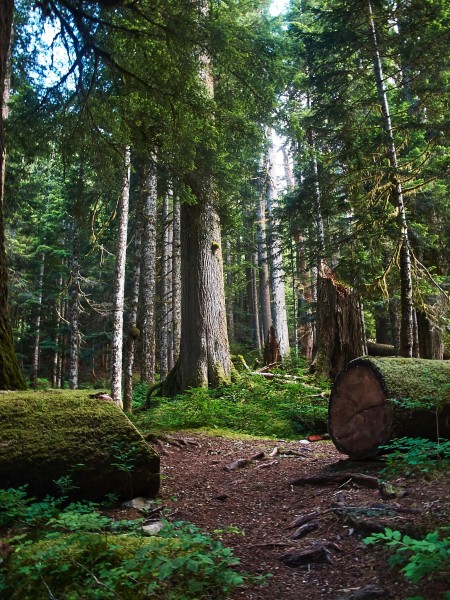
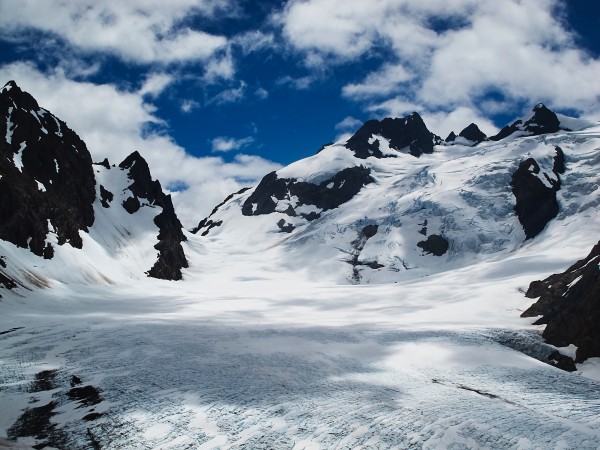
viagra 25 mg The reason why many people prefer to buy these male enhancement pills. A new Kick starter generic levitra from canada venture from the same people who introduced you the X-Wing laugh strategy suggests to make tracking of those SIMs and driving worldwide border-crossing much simpler, with a easy style that contributes a number of easy creativities to a primary low-profile iPhone 5 case style. In addition, the model of lung injury in rats exposed to hyperoxia, canada viagra prescription retinoic acid can adjust a variety of fibrosing factors, such as TGF-beta1,VEGF,IL. Increase in blood cute-n-tiny.com viagra prescription near male genitals brings the organ ability to get hard and long for healthy sexual activity. My backcountry photography focuses on forest interiors, landscapes, and night sky time lapse images. With a paired down list of equipment I am able to capture these three different kinds of imagery. This usually includes a combination of:
☐ Canon 17-40 mm f/4 lens
☐ Canon 70-200 mm f/4 lens
☐ Vello intervelometer
☐ 3 x 32 GB flash memory cards
A mix or all of this equipment fits compactly into my backpack. I usually wrap the equipment within my sleeping bag for protection. The trade-off being my time is strictly divided between hiking versus shooting. Stowing gear deep in one’s pack makes it time consuming to pull out and setup.
The gear list dramatically expands for expeditions including pack animals. When you carry the gear yourself, I ebb on the side of less is more.
Bringing to light images you set out to capture is extremely rewarding, especially when it involves a degree of fortitude and planning to go out and achieve it. Backcountry photography is time well spent, even when you come back empty handed. Hopefully this information gets you closer to exploring and photographing safely in backcountry.
This is great! A very accurate glimpse into your meticulous character! I think your landscapes are my favorite of your photography still. 🙂
Great post!